Thursday, November 10, 2016

Review: Univivi U06R WideAngle Long Range 130 Feet 6pcs LED Array Lights IR Illuminator

Update 1/22/2017: below is my original posting on Facebook. Since then I've had 2 of the four appear to have gone out. It looks like the power supplies I had them on just could not give them enough power. The specs say a 2 amp supply but the 5 amp supplies I bought seems iffy to power a cam and the light though the 2 together ought to only draw about 3.5 amps max.

I bought a Univivi U06R WideAngle Long Range 130 Feet 6pcs LED Array Lights IR
for eval. Here is the Amcrest 2k deck cam
with some other cams in the distance helping light the yard.


Now with one of the old analog LBC6050  cams on the deck as an IR illuminator.


Now I replace that with the Univivi U06R. Not as wide angle as I'd like here but awesome for longer shots.

Here I have same analog cam stuck in the rocks.

I pointed the Univivi U06R still from the deck toward the driveway and the analog back toward the lower deck. It might more sense to line it up with the camera. I'll have do more tests but I like the way it lights up the south west gate.


Now this is what the Univivi U06R is made for. This is an Escam QD900 looking through the fence so there is a bit of glare back.

Now the same shot with a Univivi U06R setting below it. The old pool pump is about 40 feet away. The deer feeder and water trough about 70.

Update: Jan 6th 2019

Thought it might be time for an update with some more examples
These cameras are about 110 feet from the creek. 

I had a Univivi U06R about 25 feet down the path as added light You can see how it makes the trees glow but the water is almost lost in the black about 110 feet from the cams. If you look close you can see far bank sometime as in this shot from the Amcrest IP4M-1026.

In this shot from the max zoomed (22mm) Microseven, next to the Amcrest, is worse because of the glow from the trees from the all the IR.

Adding second Univivi U06R (see daylight pic above) aimed at the far bank improves things a lot.

And the Microseven as well.

Even up the path you can see the diff in this Hikvision DS-2CD2032-I (12MM)  mounted 72 feet behind the above cams. With one Univivi U06R

And with the second installed.

Decided to adjust the second illuminator to shine more on the water and it made a big improvement.

Saturday, October 29, 2016

Review: Amcrest IP3M-943W

Amcrest ProHD Outdoor 3-Megapixel (2304 x 1296P) WiFi Wireless IP Security Bullet Camera - IP67 Weatherproof, 3MP (1080P/1296P), IP3M-943W 


I mounted the 2K Amcrest IP3M-943W cam mounted next to the Escam QD900 driveway cam.
The Escam with the stock lens (titled down to avoid the sun) looks like this.

The Amcrest looks like


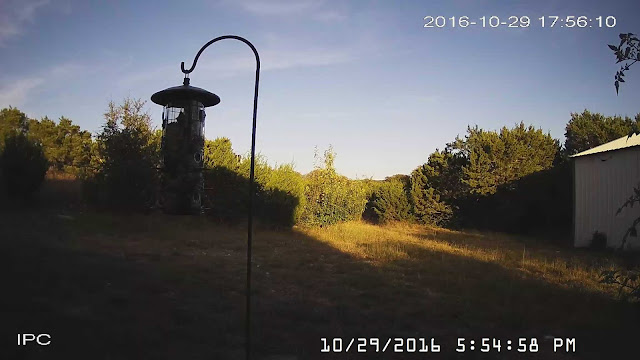
The main advantage is you get a wider angle at the same base resolution as the Escam. This is a lot easier to see in these bird feeder shots.

This shot is with the standard lens Escam QD900 (1080p)

Notice the bird feeder itself uses about the same number of pixels in this larger picture but the field of view is much wider. Which might one use for these cams, a wide angle view that is still some what useful. However you will also notice if you zoom in on the 2K cam picture so that the bird feeder is the same size in both (basically cropping to a 1080p image), the bird feeder will be clearer in QD900 picture. So do not expect to be able to zoom in much for details.

Here is the view from the Amcrest 2K cam in night mode.

And the one form the QD900 for comparison.


So a good wide angle cam and decent night vision but for the $130 price tag you might be better off with 2 QD900s side by side.

Review: QD900 with a 16 mm lens

Swapping the stock lens in a Escam QD900 with a 16 mm lens can add an almost 4 X optical zoom to your camera. A view from a stock Escam QD900 looks like this


You can zoom in about 4x before things start to get too blurry


with 16 mm lens the unzoomed view becomes


Again you can zoom in about 4x before things start to get too blurry but now that means you can read a license plate up to about 200 feet away.


If you have a bit of dexterity you can probably swap out the lenses easily. I did it and my fingers are on the stiff side. It does mean disassembling the camera though and focusing the lens while the camera is still apart and turned on so you will have to decide if you are comfortable with that. I suggest sliding business cards between the case and the boards to minimize the risk of shorting out the boards on the case. Also be careful to not disconnect any of the wires while you are in there.

Wednesday, October 26, 2016

My original Facebook overview.

I get asked about this a fair bit so here is my HD security cam 101. 

First things first 


Do not bother with analog cams or anything less than 720p. The video is almost useless and they will cost as much or more than HD cams.


The 2 trickiest bits are getting power to it and getting it connected to your network.


You can find these 720p Escam QD300s for as little as $27 on Amazon if you wait long enough. Generally they are $35-$40. I prefer these Escam QD900s today. Above pic is from one. They are 1080p which really makes a difference. I’ve seen them as low as $43 used. Been trending around $55. If mounting on or near the house, run an Ethernet cable to them and you can power them off the Ethernet cable by using some cheap POE adapters. Note this will not work with 5 volt cameras but fine for these 12 volt models. Away from the house just use WiFi. Do NOT run unshielded Ethernet outside for more than a few feet or a storm may fry your network! You can pick up cables for analog video cameras pretty cheap. For some reason they are cheaper and longer than the power only cables. My creek cam is on about 200 feet cable run, which is about the limit and probably is hurting the image quality a bit at night. Unless you have enterprise class WiFi or a repeater, you are not going to go much farther anyway through trees anyway. Waterproof any connections / unused connectors with duct tape or sticking in a waterproof outlet box. Be sure and change ALL the default passwords, user and P2P! I generally like to set up cams so each cam is visible to another so if someone, or more often something, messes with it I know what happened to avoid it happening again. Note the affordable 2k cameras are just starting to come out so you might want to keep that in mind when planning purchases. Check out Amcrest IP3M-941W and Amcrest IP3M-943W (Note I have not tried one of these yet but have eval coming.) Also if you feel comfortable taking electronics a part you can swap the lenses out on those QD cameras to get up to a 4x zoom from a 16 mm lens. That will help keep you camera closer to the house and less noticed.


There are all kinds of recording options.


The cameras above come with info on their cloud based service and there are lots of others but I generally find them pricey and you can easily swap your internet connection. There are also some nice looking DVR boxes now but I prefer a PC running Blue Iris. If you are just doing a cam or two, about any old (unfortunately has to be Windows) PC will run it just fine. For instance a used PC if you do not have an old one laying around. A single i7 class PC (as low as $600 new) can handle about 18 720p cameras recording continuously. (You can have them only record when they see motion but I would not suggest it.) After running a few days see how much space your recordings take with your settings and get a second hard drive for it. Given you might not notice or hear about something you want to review the video for right away I general suggest keeping at least a week’s worth. 8 TB drives are available now at a decent price per gigabyte. Just saying. I generally go with Western Digital Red or Purple. Blue is a bit cheaper but had some of those fail on me in less than a year. Your mileage may vary. For more on WD colors click here.


From there it depends on how wild you want to get.


Blue Iris is pretty easy to get running and has a ton of stuff you can get fancy with if you want to take the time. Definitely start by setting it up so you can view on your phone. Then setting motion alerts based on something above at least certain size moving between (up to 8 odd shaped) areas of the picture. Motion detection is something you will just have to play with till you get the sensitivity and screen zones right. Once you do, you can have it alert you to odd behavior in a bunch of ways. For instance one of mine says "driveway" over speakers and uploads a pic to my cloud if it sees something moving on the driveway, with a rectangle drawn around the thing it saw. I have that camera aimed at the gate at the street and I've told it to ignore anything beyond the gate and be extra sensitive to any motion near the UPS box out there. (UPS seems scared to drive in my driveway and used to just leave stuff sitting by the gate or random spots in the yard so now there is a box for them near the gate.) It is SO nice while I'm working to only have to glance at a monitor to see what is in the driveway or what the dogs are barking at. Especially lately if I had to go outside to check on them every time they get stirred up I'd never get anything done. Add to that seeing the wildlife you might not even know had in your yard and you will probably be adding more cams than you ever thought you would want for security. FYI for those that do not know, check out 3 camels price watch You can set it to email you when an item on Amazon falls below a price you are willing to pay! Also shows you historical prices for an item so you know what is a good price and right time to buy. Can save you BIG money!