Showing posts with label 1080p. Show all posts

Friday, August 28, 2020

SereneLife IPCAMOD47 - hard pass

Outdoor PTZ IP Security Camera - 4X Optical Zoom - Starlight Night Vision 2mp HD 1080p Home Wireless WiFi Video Surveillance - Two Way Audio, Cloud Storage, Alexa Show - SereneLife IPCAMOD47

Note description says 36mm lens but I think they mean 3.6 mm lens and it is fixed, not zoom (see below).

Manual and specs can be found here

When I went back looking for an alternate to this I'm wondering if I meant to order this 5 MP cam given it looks exactly the same though has totally diff specs and only $20 more. Already boxed this one up to go back. Below is why.

Cons:

  • Appears the only way to set up is via phone while cam is wired
  • In cam web interface is only available after setup via phone. In fact it does not even seem to get an IP address from DHCP till after you set it up via phone by scanning a tiny, hard to scan QR code.
  • Requires creating account to use app needed to setup
  • Zoom appears to be only digital and no zoom controls in web interface.
  • No common protocol support so forget using an NVR including Blue Iris.
  • Even less feature controls than any of the dozens of cams I've tried (See screen shots below)
  • Web interface wants plugin for IE that antivirus blocks from installing (see screen shots below) though plug does not actually seem to be needed. On Chrome you get not video at all though it does not ask you to install the plugin
  • Phone lost connection and would not reconnect despite web interface still working.
  • Mute speaker and mic controls in web interface do not seem to work. You will need to mute your PC to avoid feedback during viewing via the web app if cam is within ear shot
  • Takes long time to boot up and be ready
  • NTP requests to odd server triggers IPS alerts but you can at least change it. (See screenshot) 
  • Time defaults to 1971 and no option to sync with PC. Only can turn off sync and set manually at which point sync turns back on when saved
  • Note factory reset does not seem to actually reset all settings.
  • Firmware update gets flagged as network Trojan though probably mistakenly.

Pros:

  • Has motion triggered lights
  • 512 GB SD card support per manual though ad says 128 GB max. Seemed to work with a 256 GB SD fine. Though when I pulled the SD card when getting it ready to send back I did not find any video files on the SD. Just a "backup" file. Though I did see clips in playback interface. 
  • Default login appears to be random string though you do not seem to be able to change it

Stuff that would be pros but did not get to try

  • 2 way audio
  • Alexa support
  • Starlight sensor for color night vision

Screen shots

Network options

On screen display settings. If you turn on Display name you get a prompt that only takes letters, not numbers.

SD card screen

Motion settings page 1

Motion settings page 2 though both would fit on one easy.

Recording schedule screen

Maint screen


Other screen which is volume settings.

WiFi setup pops up right after first login

No video/audio stream on Chrome. Pan tilt controls also appear to be dead.

Yet Chrome did get a pic from the camera. It just goes blank when you click the play button. Note it does not auto play.

On IE you get prompted to install a plugin

IE after ignoring plugin install request

Time setting screen. Note the odd ntp server.

Typical download option. At least the plugin comes from the same place as the firmware update

Should you click Run here you will most likely get a nasty message from your anti virus program that just says I'm not letting you do this.


Sunday, August 11, 2019

Doing the math on pixels per inch at a distance for your cam

If you think zoom and enhance is a real thing I have some bad news for you. You can guestimate a pixel that might come between two but that is not really adding detail. It is just making it bigger. Even with some sort of fancy AI like in No Way Out it is just going to convert the image to something like you expect to see. Like seeing faces in the clouds. Just think about it and it should be obvious, pixels can not magically resolve into something the camera did not see. The best you can do is monkey with contrast and brightness and maybe a bit motion fix if you are luck. So you need a minimum of in focus pixels snapped at a high enough shutter to reduce motion blur with enough light and or sensitivity to have the contrast to work with.

Yet I'm still seeing a lot of posts where people are talking up static focus 1080p cams with wide angle for outdoors. Let's do the math on that. There is a simple calculator online to get the width of the area being viewed by a cam with a given view angle. For example let's take my old work horse the Foscam 9800 series that is 720p and 70 deg view angle.

So at 20 feet the view width is 24.4 feet or 293 inches. 720p resolution is actually 1,280 pixels so when we divide the pixels by the view width you get  4.3686 pixels per inch. So a face, about 6 inches wide will be 26 pixels across at 20 feet with this cam. 40 is considered to be the min. So even with the best lens focused for 20 feet this is still not going to cut it.

For convenience I worked up the charts below from my compare sheet. Note these charts assume the camera is focused for the target distance and not the upscaled resolution some cams advertise. Despite claims, outdoor fixed focus cams seem to be focused at around 20 to 30 feet. You might get a "decent 2X screen grab" of targets within +- 10 feet of that. Of course for a large range of  depth you really should look at a camera with auto focus like the Reolink RLC-411WS I've tried. Though it has had the occasional glitch as well. For long distance something adjustable like the Microseven 6-22mm 3MP Manual Zoom Varifocal Len HD 1080P. Or to get an idea of what you might be able to see with a certain model in your location try IPVM calculator which lest you stick a cam on a map of your property to see what the view angle looks like and has simulated day and night shots at the distance you give.


Not those are best case numbers under perfect conditions. While 7 pixels per inch is bare min 14 is the more accepted min. If I change the wanted pixels per inch to 14 the last chart becomes

Note 12 degrees is a fairly extreme telephoto lens in the range of 22mm
70 is standard though up to 90
between 90 and 130 is often called wide angle
180 to 360 are often called 360 view cameras

For a more indepth info look here.

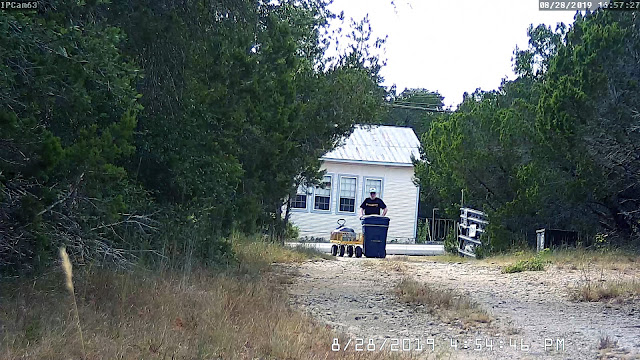
For a visual compare here I am about 33 feet from the cameras.
First an old Foscam FI9804PS 720p and 70 degree view angle

Now compare that with a Reolink RLC-511-5MP with auto focus but zoommed to widest view of about 90 degrees.

We can obviously see a lot more  and it looks clearer. Just for comparison here is the view from a 1080p  M7B77-WPSV1 at max zoom to a view of about 12 degrees located about 190 feet way.

The main diff appears to be the angle .

Now crop the images down to just me and the cart and make them the same size for a recognition compare. Note the sizing is done by the browser. You might interpret a bit more with a smart resize.

The Foscam image cropped
The Reolink image cropped

Lastly the Microseven image cropped.
So a 1080p cam with a 12 degree angle and focused for distance yet almost 6 times the distance away would be better for pulling a plate at the gate than the 720p with 70 degree view. Obviously the 5MP at the gate wins though probably by not as much as you would have thought. I should note here too the Foscam was only doing about 1 fps till I ran power out there so I hook up and access point via Ethernet Over Power. I did that so I could stick a Wyzecam V2 out there but that was a bust. Given its 110 degree view you get a shot like this.

First here is the Foscam from the Wyze compare test. I'm a bit further out in this one about 60 feet from the cams. You can see the zoomed Reolink image behind it. Note images were resized to match width of widest image (the Roelink).

Here is the save shot form the Wyzecam V2

And the uncovered Reolink zoomed to its max of 31 degrees horizontal.
Note the glitch in the pic turned out to be a config Blue Iris issue. Inspect sets it to be a generic RTSP and you want to set it as a Reolink.
And lastly a similar shot with the Reolink unzoomed.

In case you are wondering here are some shot with me much closer.
Foscam shot of me at the parcel box
Wyzecam V2 shot of me at the parcel box

One last distance compare back down the drive about 85 feet from the cams. Between the Microseven still zoomed the max.

And an Amcrest 4K IP8M-2496EB with about 112 degree view angle.

For those that think you can just zoom in, here is what you see if you zoom in to match the Microseven.

But there is one more factor to consider, focus. Autofocus can add a lot though when it gets it wrong it can make your cam useless too. Here is a close up shot with the Foscam where I'm just 7 feet away. The cart maybe double that.
Note the plate looks good but the logo on my cap is blurry. I'm too close for the range this cam is set too.
Here is the same shot from the Reolink zoomed out to the max.
Notice both my face and the plate are in focus because the camera has adjusted.
The down side, something flying too close to the lens can leave you looking like this.

Thursday, October 11, 2018

Rexing V1P vs V1 3rd gen Dash cam

Rexing V1 3rd Generation 4K UHD WiFi Car Dash Cam 2.4" LCD 170° Wide Angle Dashboard Camera Recorder with WiFi, 16GB Card, G-Sensor, WDR, Loop Recording
with
Rexing GPS Logger for Rexing V1 3rd Gen, V1P 3rd Gen, V2
and
Rexing V1P 2.4" LCD FHD 1080p 170 Degree Wide Angle Dual Channel Dashboard Camera Recorder Car Dash Cam with Rear Camera, G-Sensor, WDR, Loop Recording
with
Rexing GPS Logger for V1 and V1P

Overall I'm quite pleased with the result over my previous dashcam, a VC-250 Dash Cam with GPS. Though I miss the remote on the VC-250 to trigger protecting of videos from being overwritten. Finding and pushing a button on the camera while driving is not practical. That experience taught me too an interior cam is about worthless for seeing out the back. Which is why I mounted a Rexing V1 3rd Generation 4K camera facing front and a Rexing V1P mounted on the rear window with its remote cam inside pointed forward to catch an inside and bit of side view that might be needed. The over all effect is almost a 360 exterior view plus interior. Decent audio on all streams makes syncing the stream almost automatic in a editor like Adobe Premiere Pro.

Here is a quick multicam video I made from my Rexing V1P rear mounted camera and my forward mounted Rexing V1 3rd Generation 4K. Elements from the each cam are overlaid to keep the SUV in view and the GPS speed and time readings. It is an example of the clarity of the cameras and how they can show evidence if you need it.


For example in the above thumbnail I mixed the video down to the 1080p rez of the Rexing V1P forward (my back view) stream, overlayed the interior view from the Rexing V1P's remote cam and  overlaid a zoomed in image from the Rexing V1 3rd gen to show the lights and a cropped but dull rez shot of the Rexing V1 3rd gen's data overlay at the bottom to show speed and time. Lastly I added text. With something like Adobe's Premiere Pro it is not all the hard but not so easy you would normally do without reason.  I did a post digital zoom on the 4K stream to highlight what was happening. Note the 2X, 3X and 4X flash in the lower right to indicate that it has reached that level of zoom. (The editor smooths the changes in zoom so you might not even notice them.)  The picture near the end is still pretty clear at 4X zoom. Better than a lot of 720p cams I've seen unzoomed.

Note the raw video has GPS data encoded if you have options GPS. If you use the JMS DVR GPS player to view the videos you get a screen like this.

This is one of the improvements over the VC-250 that you had to convert the videos to see them outside of their app and after converting you lost the GPS data.

Note I replaced the audio on these to avoid audio book copyright issues.
Rexing V1 3rd gen night video sample
Rexing V1P exterior night sample
Rexing V1P interior night sample
Playlist of other Rexing videos of mine

Friday, September 7, 2018

Running a camera on battery


What I wanted to achieve.

I wanted to get a cam on my mailbox which across the street. But the closest place to an outlet that could get line of sight is over 300 feet from any building and across the driveway. So we are talking major construction to run a line or POE cable out there. I already have a couple cams down by the creek running longer distances from my super AP ( a UniFi AP Outdoor+ with a Ubiquiti Airmax Omni AMO-2G10 10Dbi 2.4 GHz Rocket antenna) so I started to wonder what kind of battery would it take to power a camera.

Experiment 1

Hooked a Foscam FI9804P 720P Outdoor HD Wireless IP Camera to a 12V 9Ah Compatible Battery normally used in pairs in my UPSs and it ran 35 hours.
Temp UPS battery setup

Experiment 2

Same Foscam FI9804P 720P Outdoor HD Wireless IP Camera but with a Duracell Marine Battery (Group Size 24) and it ran about 6 days. Was not sure it was fully charged since that seemed short so switched it back to the UPS battery which only lasted about a day this time. Running it dead might be taking a toll on it. Put it back on the big battery and up for 6 days so far.


Experiment 3

After talking to a neighbor and looking up some specs I started thinking a Wyze cam v2 might be a better way to go. About 1/2 the power draw, has audio and 1080p instead of 720p. Also smaller and needs less IRs to see so less visible. Of course the downside is it only records to the cloud and SD card right now unless you seriously hack it. Also not sure about its WiFi range but will make a good experiment. I'll first try it in parallel with the Foscam on the big battery and the Wyze on the UPS battery. Since it is an indoor camera I also bought the Frienda Camera Cover for Wyze Cam 1080p HD Camera and iSmart Alarm Spot Camera, Black Skin Cover with Security Wall Mount, Weather Resistant, Against Rain and Dust and some adapters to power USB off a battery. Camera, cover and 25 foot power cord total cost just $46.96. Add another $9.99 for a 32 GB SD card for redundancy sake.

Here is what it looks like with the cover on. It is a rubber like material which should seal it pretty good.
From front

From bottom
Ran into a problem with the power adapter I rigged up from WINOMO Car Auto Battery Terminal Clip 12V DC Cigarette Lighter Socket Adapter and Car Charger RAVPower 24W 4.8A Mini Dual USB Car Adapter with iSmart 2.0 Tech, Compatible with iPhone X 8 7 6 Plus and Galaxy S9 S8 Plus S7 S6 Edge Note 8 - Black seems the RAVPower is not long enough to make contact in the WINOMO. Ordered a Anker 24W Dual USB Car Charger, PowerDrive 2 for iPhone X / 8/7 / 6s / 6 / Plus, iPad Pro/Air 2 / Mini, Note 5/4, LG, Nexus, HTC that will hopefully work better.
 This appears to be a failure because the Wyze cam will not connect even at the driveway curve about 80 feet from the AP with line of sight much less through the woods where the drive cameras are or out by the gate where it was supposed to replace the Foscam.


Update 7/25/2019:

After almost a year of swapping out the RV battery twice a week, they seem to last 5-6 days, I finally decide to run AC out there to the gate. Very happy with the result though a bit pricey. See Option C: ethernet over power lines for details.

Wednesday, July 4, 2018

Wyze Cam Pan 1080p Pan/Tilt/Zoom Camera and V2

Wyze Cam Pan 1080p Pan/Tilt/Zoom Wi-Fi Indoor Smart Home Camera with Night Vision and 2-Way Audio

Setup was easy.


The password would be filled in above but see below.


No the QR code will not work even on my network since the password was blanked.


However when I went to check the video a week later for some samples to post and it had quit recording after a day. The camera was still tracking movement just not recording to the cloud. I had not put an SD in yet so there was nothing to check there. So I deleted the camera from the app, reset the cam and did a readd. But it would not connect. I wasted hours trying stuff. Finally I tried setting up a wide open Access Point (AP) and noticed the password was still filled in. I removed it and it connected. Repowered and it still reconnected so I wiped it all and readded to the secured guest network and it still works. While I was at it I stuck a 32 GB SD in it.


So far it looks like it is running just under 1 Mbps bandwidth. Their specs recommend 1.5


So far the main drawbacks are:


  • Only records to SD or the cloud
  • Only saves triggered video. No 24/7
  • You can only view video from the phone app (no web viewing).
  • No easy way to change WiFi password.
  • Some suspicious network activity has been reported so only use on a guest or other isolated network.
  • The above also probably means you should think twice about putting the app on and phone or tablet that has sensitive info on it.


Pluses:


  • Free 7 days of cloud recording.
  • Ridiculously cheap at just $38 including shipping.
  • Seems to do an OK  job of tracking (by doing pan and tilt) and marking moving object in the video. (See videos below.) Note people have reported being creeped out by this and have to admit it does feel a bit weird and makes the camera seem a bit alive. I was actually surprised how little video was saved vs the amount of time the cam appears to be panning to look at things.
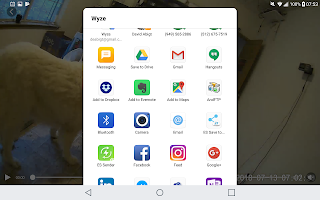
  • Can save / send video to a huge number of services
  • Alexa support just added.


I posted some sample videos on YouTube with the motion and sound detection at the default values and motion detection masked to around the dog door. Unfortunately I can not really show you the mask because when you go back in to modify the mask it only shows till the video kicks in and then defaults back to the whole screen.


Basically it is top to bottom from the wall socket to the edge of the window.


Main things to note here are how random the video is. It was triggered by noise way more than motion.


Lastly connecting the cam is slow and fails fair amount. Being an encrypted guest network might be a factor in that though as mentioned above I would definitely suggest isolating from your network like that.


Since the cam does not record 24/7, if this was my only cam in there I would be thinking of taking off the mask and cranking the sensitivity. Though that would probably make finding video of actual motion harder to find. As is I already have 2 cameras recording 24/7 in there to me it is mainly another motion detector and hopefully gets a close up of who is using the door should I need to know. If they made an outdoor version of this I'd definitely have a spot for it and would probably recommend at double the price. Would think about a couple for the barn if I could monitor on a local PC since most of my cams are to let me see what is going on (as in what has the dogs upset) with as little distraction / time wasted as possible. Having to open an app, connect to a cam and find a notification just does not do that. To notify you with a video if something is moving where there should be no motion it is not bad. Especially for the price.


Update: 8/11/2018 More issues.


Found these instructions online for using Tiny cam to bridge the cam to the local NVR. They did not work for me. Might be some sort of manual firewall config though. Note they seem to connect to the server not the cam directly so you might be burning as much down bandwidth as up using them. When you test your connection it says it is receiving something but dropping all frames even if you point it at an address that does not respond which is either misleading or something else is going on.


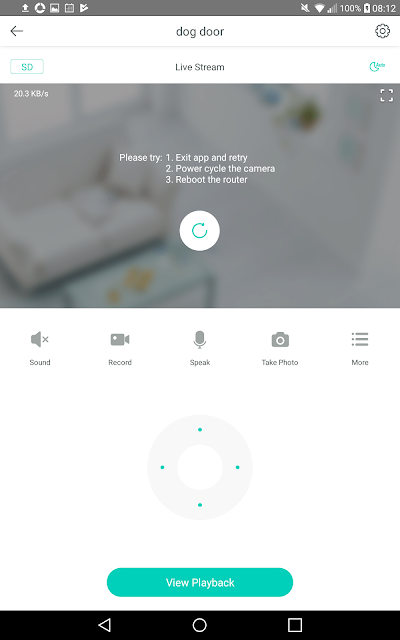
However, trying to debug first I checked the regular app and it could not connect either till I rebooted the cam. Even after rebooting the cam it kept dropping out. So that might be an issue too. Oddly there are plenty of recordings which would seem to indicate the stream is getting to the cloud.


On a whim I tried connecting with the Amazon Show. But it now seems to think my one cam is two cams with the same name and will not connect to I rename one.


Update 11/22/2018: Got Tinycam to link to Blue Iris


Note I started with Pro version this time. Not sure if that was a factor in it working this time. 


Note when selecting Wyze and the cam type cloud is the only protocol available despite what the pics in the instructions sem to show. Then in Blue Iris setup your video config like this

Blue Iris video config window

The host and port come from the Tinycam app as mentioned in the instructions. Note the capital I in cameraId. 

The value can be found be pulling up the live view of the camera in a browser. The first screen you see when you point your browser to the Tinycam web server is the status / maint screen.

Tinycam status and maintenance page


Click on the All Cameras button and you get something like this.
Tinycam view all cameras page
Click the fullscreen icon
Full screen button pic
on one of the cameras and the cameraId for it is the end of the URL (Highlighted with yellow rectangle in pic.)

Tinycam single camera view page


This should get you connected however for for me:

  • The first cam, the pan version, connected fine but second, a V2, was iffy getting to show in the phone interface, web interface and never did connect to Blue Iris while I was sorting all this. I did move the V2 closer to the AP though and it started working so it might be a WiFi issue. Especially then coupled with its failure to connect in the driveway.
  • The Samsung Note 4 I was running Tinycam Pro on got hot and the drain on the battery even with the display turned off was high enough the battery ran out after s few hours. After recharging the phone, only running the Tinycam app, removing it from the case and placing it across a pyrex bowl to maximize air flow I got it to run overnight without overheating or the battery going dead.
  • Lastly it appears Tinycam is pulling from the cloud service which means you will be buring double the external bandwidth that would only be local with a camera with ONVIF or RSTP support.
Update 1/17/2019: After shutting down about everything else on the phone (does not even have sim) and only connecting to one Wyze camera. I noticed Tinycam was offline and when I checked it this is what the phone looked like. Probably lucky it did not burst into flame.
I put in a new battery and placed a temperature monitor with alarm on it. So far it seems OK but keeping a close eye on it. Here is a chart of the temp of the phone vs the room it is in.


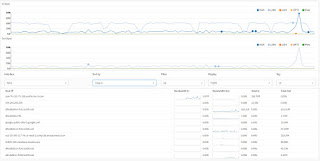
In the load chart below it appears there is an upload of around 7-9 Mbps from the 2 cams. There is of course other stuff going on which spikes the upload to 20 Mbps or more and the download  is an almost constant 40 Mbps. But again in the dips is a matching 7-9 Mbps load.
OPNsense traffic report page

Here is a shot of the Tinycam stats screen the second day showing a bit on improvement over the day before.
Tinycam status info

After a couple days of up and downs I can't say I recommend Tinycam as a bridge or a constant view solution. Though at least some of the problems are probably Wyze related. I had both cams working for awhile the cameras seemed to take turns being offline. I tired installing on Bluestacks which seemed to have similar viewing issues and as far as I can see, no way to make the web server part of Tinycam accessible outside of Bluestacks. I also tried it on my new LG G Pad 2 a lot more powerful than the Note 4. Unfortunately the best I could do was get one camera to connect. I should note here too even the Wyze app was having issues talking to the cams despite signal levels of up to -26 db (99%). In fact I saw more issues with the cam with the stronger signal.


The last thing to try is OpenIPC Firmware for Wyze Cameras 

It is basically rooting the camera to convert it to a simple WiFi camera. It is open source and appears to be a simple SD card install. 

Note "Set up Wifi in the SD card config folder wpa_supplicant.conf" in the instructions means rename wpa_supplicant.conf.dist to wpa_supplicant.conf then edit it to change SSID and such to match your WiFi network.

ctrl_interface=/var/run/wpa_supplicant
ctrl_interface_group=0
ap_scan=1

network={
        ssid="SSID"
        # Uncomment to connect to Hidden SSIDs
        #scan_ssid=1 
        key_mgmt=WPA-PSK
        pairwise=CCMP TKIP
        group=CCMP TKIP WEP104 WEP40
        psk="PW"
        priority=2

}

However once I did this the camera would no longer connect to WiFi. Seems this is a known issue.   After some research on Raspberry Pi blogs I found some dos that said priority=2 is only if you have more than one WiFi you use. removing it seems to have solved it.

I also discovered the demo.bin file is a boot loader altered to look at the SD so you really only have to mess with the holding the button bit the one time. I should also note the OpenIPC version has all the logging stripped out of run.sh so when things go wrong it is impossible to know what happened. So added some back similar to what was in the Dafang hacks and a couple things of my own in mine to help sort things.

CONFIGPATH=/system/sdcard/config
LOGDIR="/system/sdcard/log"
LOGPATH="$LOGDIR/startup.log"
if [ ! -d $LOGDIR ]; then
  mkdir -p $LOGDIR
fi
echo "==================================================" >> $LOGPATH
echo "Starting OpenIPC" >> $LOGPATH
echo "==================================================" >> $LOGPATH

## Update hostname:
hostname -F $CONFIGPATH/hostname.conf

## Load kernel modules
insmod /driver/tx-isp.ko isp_clk=100000000
##insmod /driver/sensor_imx323.ko
insmod /driver/sensor_jxf22.ko
##insmod /driver/sensor_ps5230.ko
insmod /driver/exfat.ko
insmod /driver/sample_motor.ko
insmod /driver/audio.ko spk_gpio=-1 sign_mode=0
insmod /driver/sinfo.ko
##insmod /driver/8189es.ko
insmod /driver/sample_pwm_core.ko
insmod /driver/sample_pwm_hal.ko
insmod /driver/rtl8189ftv.ko
##insmod /system/sdcard/driver/sensor_jxf22.ko data_interface=2 pwdn_gpio=-1 res                                                                    et_gpio=18 sensor_gpio_func=0

## Fix IR:
echo 63 > /sys/class/gpio/export
echo out > "/sys/class/gpio/gpio25/direction"
echo out > /sys/class/gpio/gpio63/direction
echo 1 > /sys/class/gpio/gpio63/value


## Start Wifi:
echo Start Wifi: >> $LOGPATH
wpa_supplicant -D nl80211 -iwlan0 -c $CONFIGPATH/wpa_supplicant.conf -B &
sleep 5
wpa_supplicant_status="$(wpa_cli status)"
echo "wpa_supplicant: $wpa_supplicant_status" >> $LOGPATH

#udhcpc -i wlan0 -s /system/etc/udhcpc.script -q
udhcpc -i wlan0 -p /var/run/udhcpc.pid -b -x hostname:"$(hostname)"  >> $LOGPATH 2>&1

## NTP Server
echo Start ntpd: >> $LOGPATH
ntp_srv="$(cat "$CONFIGPATH/ntp_srv.conf")"
/system/sdcard/bin/busybox ntpd -q -n -p "$ntp_srv" # run ntp update  >> $LOGPATH 2>&1

## Start FTP & SSH
echo Start FTP-SSH: >> $LOGPATH
/system/sdcard/bin/dropbearmulti dropbear -R  >> $LOGPATH 2>&1
/system/sdcard/bin/bftpd -d  >> $LOGPATH 2>&1

## Start Webserver:
echo Start Webserver: >> $LOGPATH
/system/sdcard/bin/boa -c /system/sdcard/config/  >> $LOGPATH 2>&1

## Autostart
for i in /system/sdcard/config/autostart/*; do
echo Start $i: >> $LOGPATH
  $i  >> $LOGPATH 2>&1

done

On the plus side if all else fails just powering it up without the SD card seems to set it back to where it was when first set it up with your config intact.

Working with Blue Iris

If you got the OpenIPC working OK then to get Blue Iris to use it you need a video config like this


The password is ismart12
Note you need to type in the Video Path and change the RTSP port.
I have not fully tested it yet but it seems like many of the controls do not actually work and or go back to defaults after reboots.
Other I've noticed so far
Time seems to ignore timezone and shows UTC
The video stream seems to be 720p no matter what the value Manage->Setting->Resolution are set to.
Manage->Setting->Display debug info on OSD look useful
Bumping the cam seems to be too much motion for it to deal with,

CPU is really cranking and the cams seems to be running hotter than it did before the new firmware.
Motion detection does not seem to actually doing anything till you configure it and then only puts a dot in the upper right corner

It is hard to say how much CPU motion detection is using but given I've seen it hit 100% it does not seem to be worth the overhead.

Lastly night vision does not seem to be working right. Setting Manage->Setting->RTSP->Night Vision to On seems to flip it into night vision mode for a second then it flips back even when it is too dark to see anything unless you turn off IR Cut first. There might a set of clicks that get this working but this would seem to indicate it is not planned to be fixed.
So with the IR Cut on my hall at night with just the light from the bath room looks like this from the Wyze V2.
For comparison here to the view from the kennel looking back the other way.
If I turn off the IR Cut you can see a lot more
Which really is not that bad other than the tint. If I turn the lights on in the hall it is not enough to mask the tint though it should be bright enough in the daytime.
Was about to give up on this for the night when I went though the process one last time and this time there was no tint. This it the options I ended up with.
And here is the working night shot.

Update 4/29/2019 Wyze adds RTSP support.
Tried it on my Pan and was as easy as and similar to the OpenIPC SD card style upgrade though with less needed config.  Details here. So far seems like everything else looks the same. Given how hard OpenIPC drives the V2 I figured something would have to go. If the cam does not fry from the load I'll be impressed. By the next morning the case was still cooler than the V2 running OpenIPC. I did notice bumping the cam when I felt the case seemed to freak out the tracking for a bit causing the cam to bounce back and forth for a while. Had to stick my hand in front of it to give it a simple view to calm it down.

Update 5/18/2019 Wyze RTSP definately better than the OpenIPC firmware.
Bottom line, I bought another V2 to try this on after the Pan and was impressed enough to get another and convert the V2 I had OpenIPC on to the Wyze RTSP firmware.

Caveats:


On the plus side.

  • Both the V2 and Pan are supported where OpenIPC sort of does.
  • The camera runs somewhat cooler
  • I'm not seeing the pixel distortions (see above) anymore. 
  • You retain all the Wyze features including the output resolution, working day/night switch and rectangles around motion.

Reliability of the stream seems unchanged. I've gone to just putting them on Etekcity plugs and having my home automation system repower them if they are offline for more than a few minutes to workaround that. Still all and all it tough to beat for $25 and $38. Especially when you get 3 way storage. On the SD card, 24/7 stream to NVR and alerts to the cloud. That should insure you always know what happened.